It's true my sweater no longer looks like a hat for a giant but now an actual sweater with sleeves...
well maybe not sleeves exactly but at least there are stitches on scrap yarn marking wear sleeves will one day be :)
Since this is a top down I decided to try it on, make sure it wasn't too big or worse too small. Drumroll...
It fits! I have to say that I am entirely happy that I chose to knit the 36/38 size instead of the 40/42 because it's obvious that the 40 would have been too big.
I'm gonna have to get some measurements and see when I want to start the waist shaping, that's probably the only modification that I'll be making, I'll put the decreases for my waist where, well my actual waist is :)
This past Sunday I took the some of the kids to the park (Husband was sick)...
I got to knit a little while I was there
It was awesome.
Well there you have it scrap yarn, parks and sleeves! And oh yes, a giveaway as promised. Nothing too spectacular, just an apron...
I saw this fabric and it cried to me to make it into an apron, so I obligied :) I think it's perfect for summer and will be great on the dark, long winter day's to help brighten your kitchen and lighten the workload of cooking :)
So just leave a comment below, if you need help thinking of something to say you could tell a joke, write a limmerick, or even give me a math problem to work on :) Just be nice and in a couple weeks I'll pick a lucky winner at random. (please for my sake and yours leave someway to be contacted via email or if your name links to your email that works too)
Hope you have a day that's sunny side up and get knitting :)
*Disclaimer* I just want to clear the air in that I'm giving this apron away for fun and for no other reason. I love to make things and give them away and I love making new friends :)
Showing posts with label Sewing. Show all posts
Wednesday, July 18, 2012
Tuesday, May 22, 2012
Flirtatious Yellow
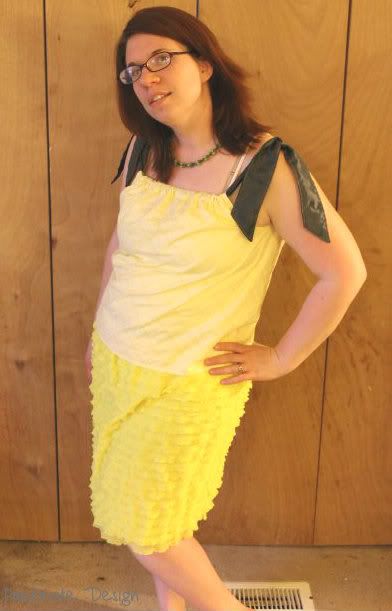
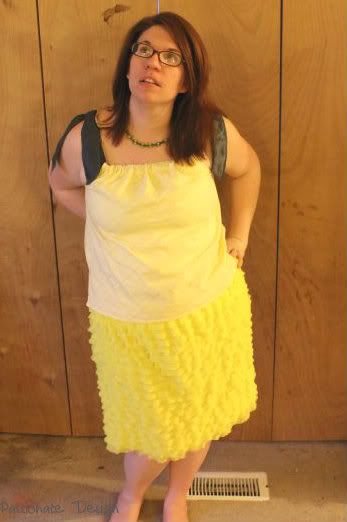
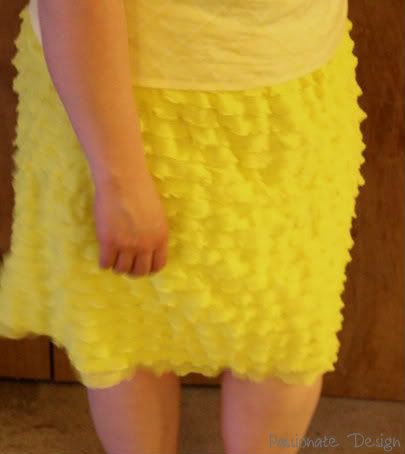
This weekend I made myself a new outfit. Honestly it wasn't an intentional plan I my part to make a new outfit but it happened and I loved it so much that well, I have to share it with you...
It's yellow too! A few weeks ago, after wearing orange every. single. day. (not that there is anything wrong with orange) I realized that I needed to break out of my color rut and try some new colors :)
I found this fabulous yellow cotton at my local quilt shop, it has a very light plaid design (not sure if you can see it...
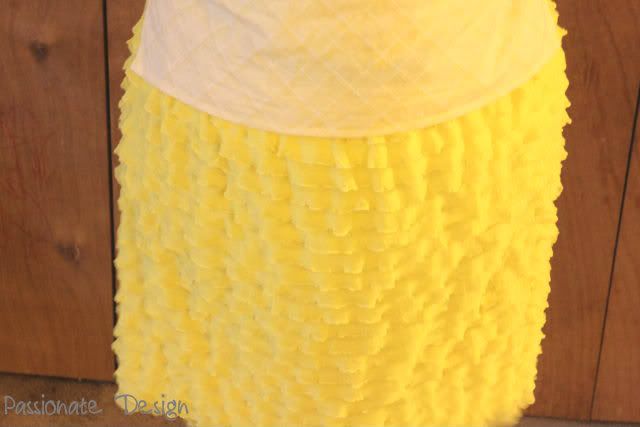
I picked up the ruffled fabric at Hobby Lobby on my Mother's Day excursion. It was on sale 30%, just too good of a deal for me to not pick up a 1 yard to try. The hardest part about the skirt is cutting it out and pinning down all those ruffles before sewing. I avoid pinning if I can. I took my hip measurement added 2 inches and then measured how long I wanted the skirt. Since the fabric is a knit you don't have to add for the hem. So I cut out a rectangle with the measurements, pinned the unfinished edges on each and every ruffle, then quickly stitched the one and only seam. Then I took some elastic for the waistband and just attached it like Dana shows on her Circle Skirt tute.
Fastest skirt I ever made, and probably the most comfortable. It doesn't cling, but flows and the ruffles hide all that you want to hide :)
So what do you think? You like? I love it! Best of all it isn't orange.
It's yellow too! A few weeks ago, after wearing orange every. single. day. (not that there is anything wrong with orange) I realized that I needed to break out of my color rut and try some new colors :)
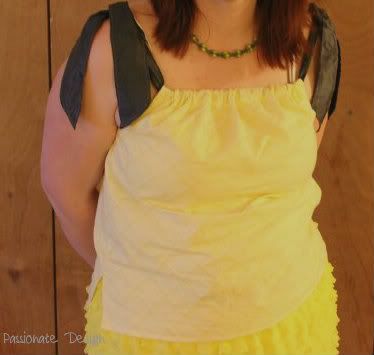
I found this fabulous yellow cotton at my local quilt shop, it has a very light plaid design (not sure if you can see it...
So I quickly whipped up a pillowcase top for me, threw in a little gray for the ties and in just over an hour I had a top. The best part about the top is that it used just over 1/2 yard to make! I freely admit that when it isn't on I think it'll be too short but am always surprised when I put it on and it is the perfect length :)
The skirt is made out of that fantastic ruffled fabric. When I wore it to church Sunday I did have to tell everyone that it was the fabric and not my sewing ability to make all those ruffles (though I think I hear a challenge in that).
Fastest skirt I ever made, and probably the most comfortable. It doesn't cling, but flows and the ruffles hide all that you want to hide :)
So what do you think? You like? I love it! Best of all it isn't orange.
Friday, May 4, 2012
I've Been Sewing, honest!
Just because I haven't blogged about any recent creations lately doesn't mean I haven't been creating. In fact in four days I made 4 garments for myself...none of which were orange :) I haven't had a chance to get around to taking pictures of one dress that I made but here are pictures of 3 things that I made.
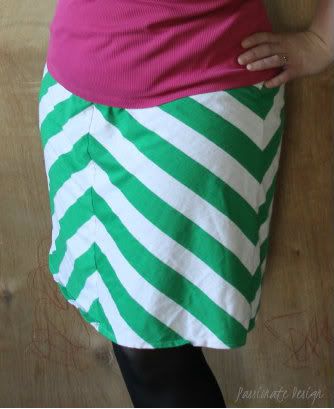
The first up is this skirt...
You see I've kind of been in a dress funk and while I love it, some days you just want to wear a top (not that you can't wear a top over a dress, I'm doing that today) but a skirt is really nice too. Except that I am over the top picky about skirts...I want them to look slimming but trendy and easy to put on but go with what I've got. I saw this skirt...
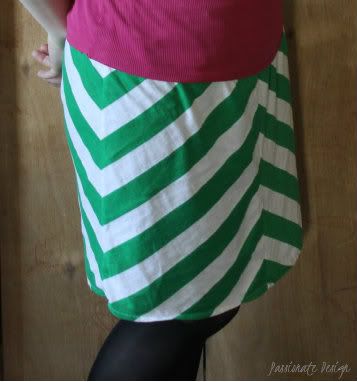
on Pinterest and knew I had to try and make it myself. This is attempt #1 and I love it!
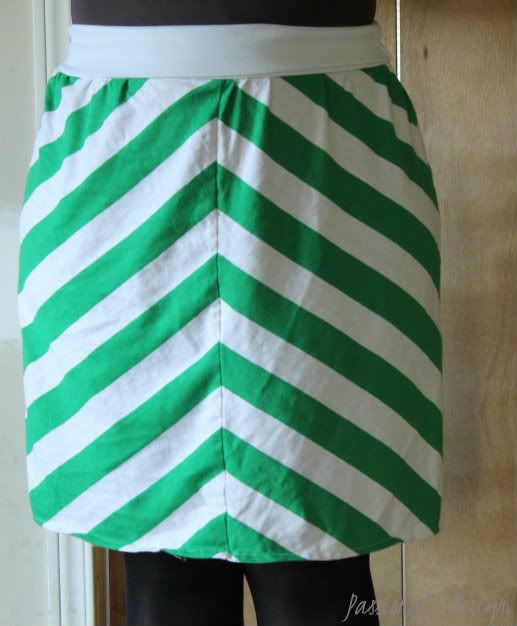
I would have made the waistband withe the same striped fabric but I didn't have enough.
This skirt took about 2 yards to make since it is cut on the bias. I probably spent more time cutting the fabric out than I did sewing it together. However, taking your time with striped or plaid fabrics is well worth it as the time you spend cutting out you save when you sit down to sew...I pin a little and then just chug it out and my lines always match up because I cut them to do so.
Now I just need to make a maxi length one :)
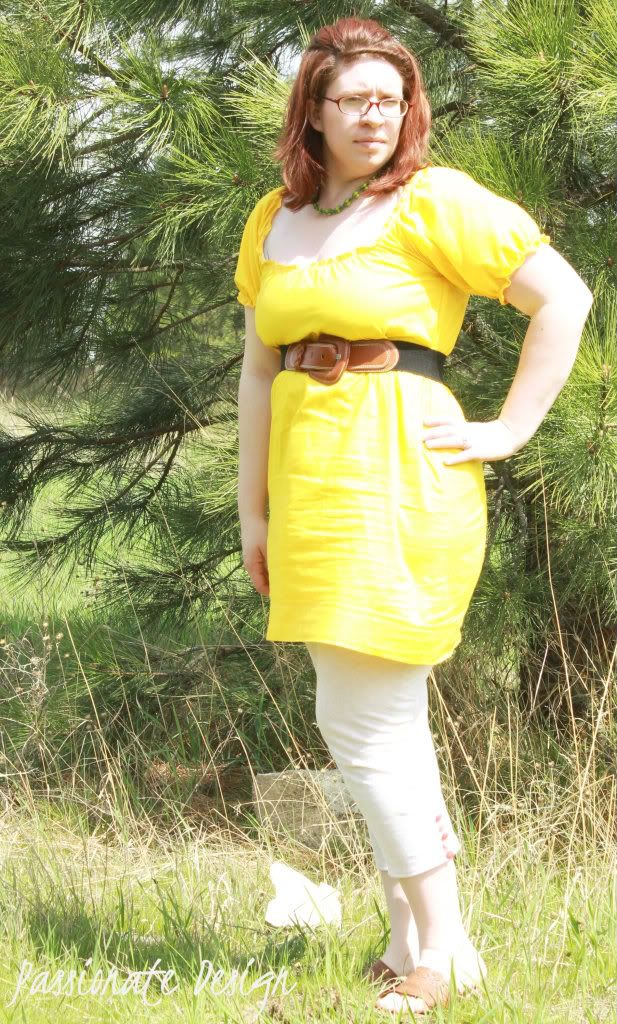
I have fallen in love with peasant tops, in the sense that they've never gone out of fashion. Look fabulous on just about everyone. Can be made from woven or knit fabric. Though more importantly are beyond easy to make. I thought it would be fun to make a tunic length top that I could wear alone or under one of my many MODify dresses.
What tunic isn't made perfect with leggings? So in a couple evenings time I whipped up a pattern for a tunic and leggings and made this wonderful outfit...
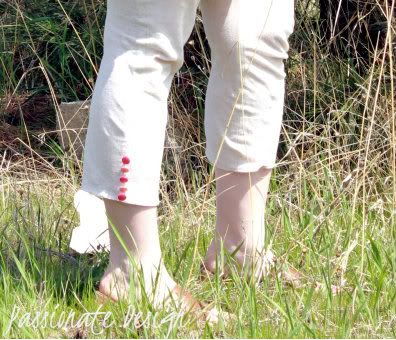
I added fun button detail on the leggings
My wardrobe is now 50%-60% handmade and the rest store bought. There is nothing like going out wearing something you made for yourself. Sometimes I do get comments about where I found something and it is great to be able to say that I made it.
I hope you all have a great weekend. I'm trying hard not to go insane or start counting down the days until September when I'll have 3 kids in school all day.
The first up is this skirt...
You see I've kind of been in a dress funk and while I love it, some days you just want to wear a top (not that you can't wear a top over a dress, I'm doing that today) but a skirt is really nice too. Except that I am over the top picky about skirts...I want them to look slimming but trendy and easy to put on but go with what I've got. I saw this skirt...
| source |
on Pinterest and knew I had to try and make it myself. This is attempt #1 and I love it!
I would have made the waistband withe the same striped fabric but I didn't have enough.
This skirt took about 2 yards to make since it is cut on the bias. I probably spent more time cutting the fabric out than I did sewing it together. However, taking your time with striped or plaid fabrics is well worth it as the time you spend cutting out you save when you sit down to sew...I pin a little and then just chug it out and my lines always match up because I cut them to do so.
Now I just need to make a maxi length one :)
I have fallen in love with peasant tops, in the sense that they've never gone out of fashion. Look fabulous on just about everyone. Can be made from woven or knit fabric. Though more importantly are beyond easy to make. I thought it would be fun to make a tunic length top that I could wear alone or under one of my many MODify dresses.
What tunic isn't made perfect with leggings? So in a couple evenings time I whipped up a pattern for a tunic and leggings and made this wonderful outfit...
I added fun button detail on the leggings
My wardrobe is now 50%-60% handmade and the rest store bought. There is nothing like going out wearing something you made for yourself. Sometimes I do get comments about where I found something and it is great to be able to say that I made it.
I hope you all have a great weekend. I'm trying hard not to go insane or start counting down the days until September when I'll have 3 kids in school all day.
Wednesday, April 11, 2012
Amelia Bedelia Dress
Well, Season 4 of Project Run & Play has begun and I decided that I will participate in the at home Sew Along. I contemplated this the last season, but really I needed clothes not the kids...a few week later and that has changed.
This week's challenge is to refashion the Circle Skirt by Dana. I must admit that my first thought was how do you refashion a skirt except to make it into a dress? I have since then thought of other options...including making a pair of pants. But I didn't do that. No, I stuck with the first idea that came to mind which was a dress.
As I made this I realized what kind of designer I am...I am a design as you go. That isn't to say I can't sketch out an idea, take notes and try to make it...but I feel much better with my finished product when just cut out fabric and go! Which is what I did here.
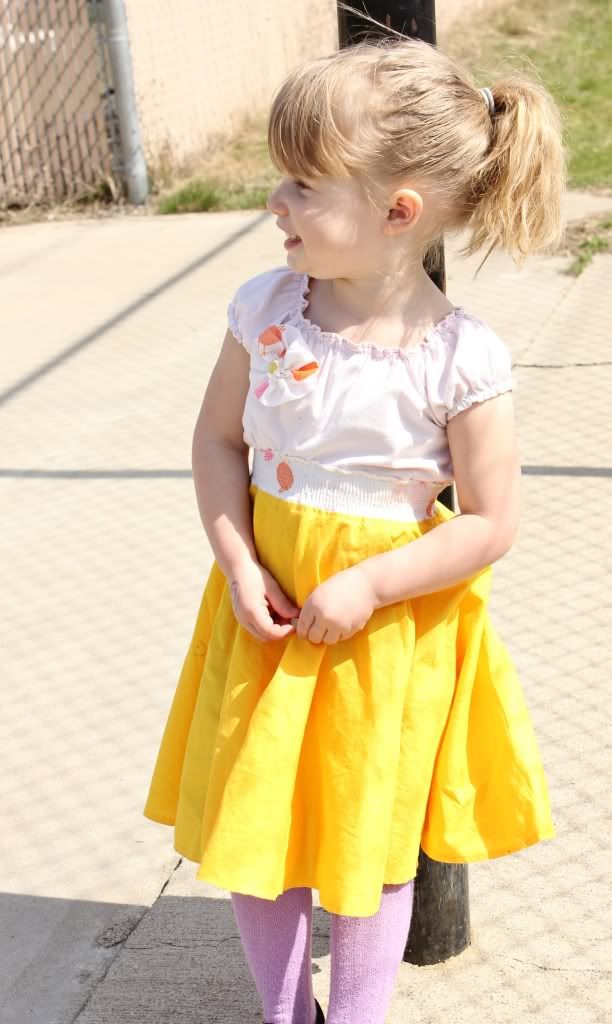
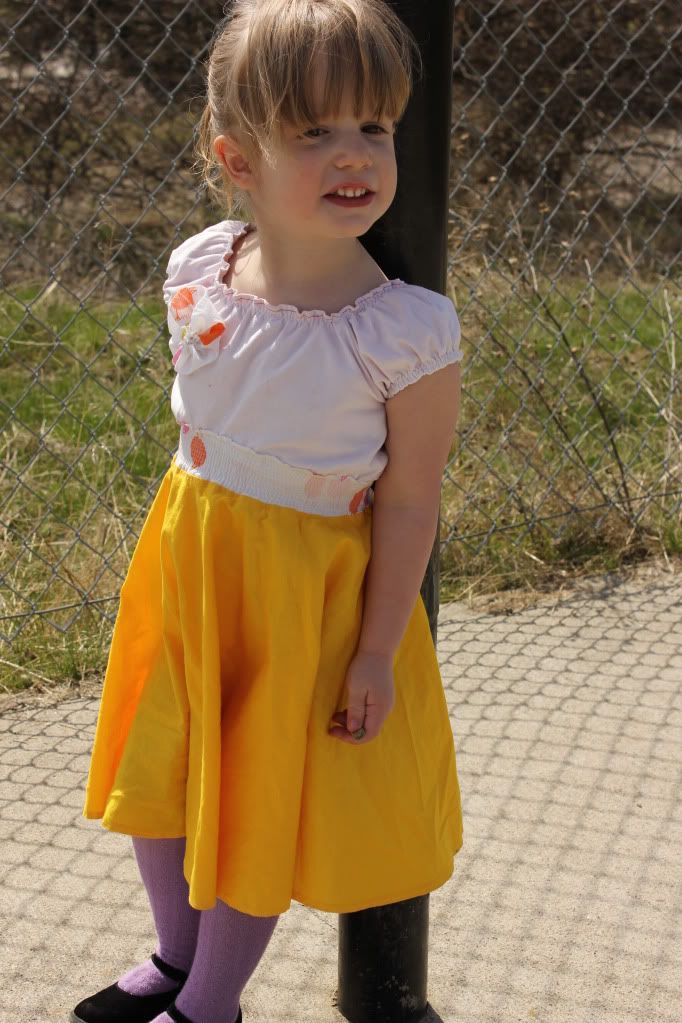
Really, it's an Amelia Bedelia dress, because I put a little of this and a little of that and came up with a dress that has no closures, but is still easy enough for Husband to put on his princess and has enough flair that Elsa will wear it but is still able to climb, swing and get messy in.
Part of me felt like it was missing something but I just can't think of anything and my high school art teachers wise advice rang in my ears "When you think you're almost done, STOP! Go any further and you'll ruin it." Best advice ever.
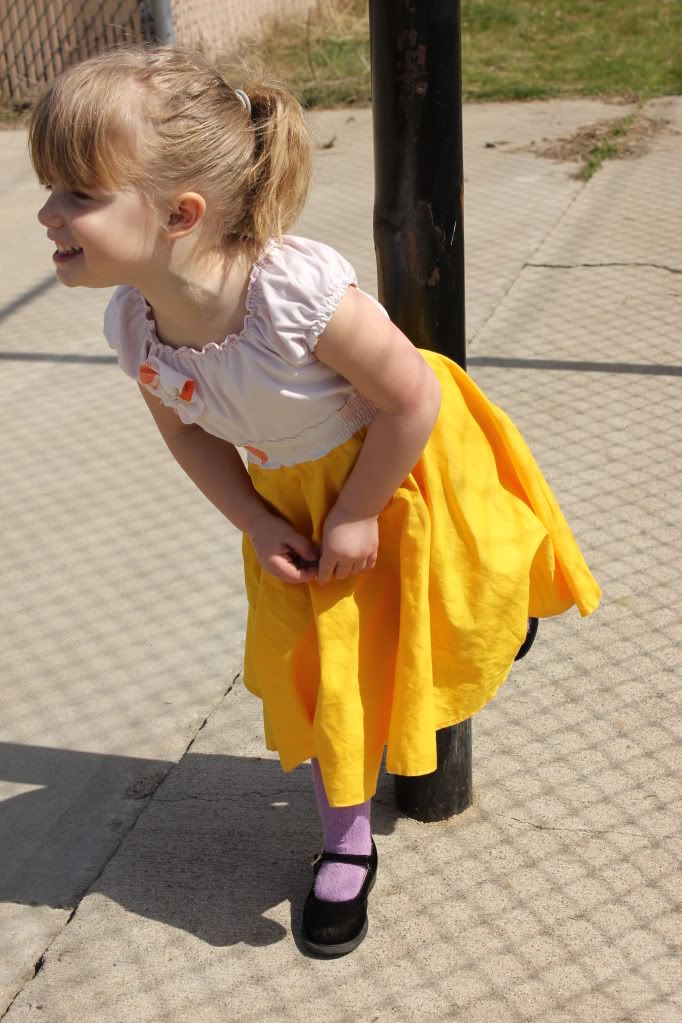
Well what do you think? True to my goal I made some of it with yellow fabric to show my support for those suffering from endometriosis and raise awareness too. Elsa actually wore this Sunday for Easter and I really think she loves the twirl of the skirt.
This week's challenge is to refashion the Circle Skirt by Dana. I must admit that my first thought was how do you refashion a skirt except to make it into a dress? I have since then thought of other options...including making a pair of pants. But I didn't do that. No, I stuck with the first idea that came to mind which was a dress.
As I made this I realized what kind of designer I am...I am a design as you go. That isn't to say I can't sketch out an idea, take notes and try to make it...but I feel much better with my finished product when just cut out fabric and go! Which is what I did here.
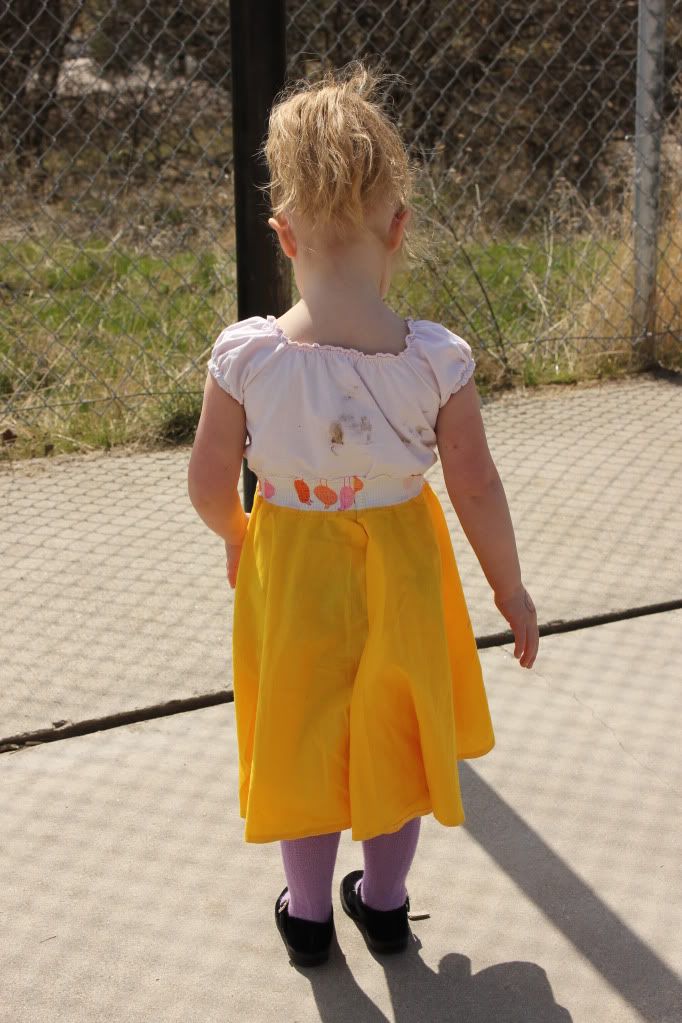
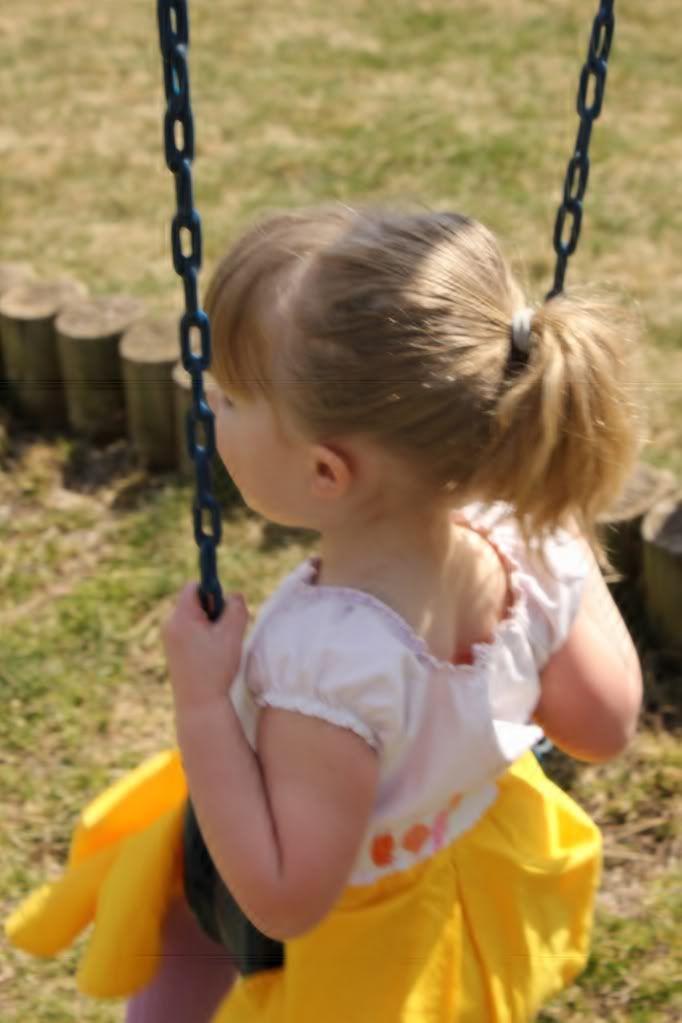
Really, it's an Amelia Bedelia dress, because I put a little of this and a little of that and came up with a dress that has no closures, but is still easy enough for Husband to put on his princess and has enough flair that Elsa will wear it but is still able to climb, swing and get messy in.
| see the dirt on the back? |
Part of me felt like it was missing something but I just can't think of anything and my high school art teachers wise advice rang in my ears "When you think you're almost done, STOP! Go any further and you'll ruin it." Best advice ever.
This is what I did. I cut out the circle skirt per directions. I sewed on the the waistband which is just cotton fabric that was a few inches short of the full circumference of the waist of the skirt. I then shirred the waistband at 1/8 inch intervals. Then I added a box pleat in the back to fully enclose the waistband (just a little zigzag over the edges). Next I made a peasant top. I knew that I wanted and empire waist in the front but a natural waist in the back so it isn't even on purpose. It give the skirt a little (2 inch maybe) train...but I love it!
| sorry it's a little blurry...action pictures |
Well what do you think? True to my goal I made some of it with yellow fabric to show my support for those suffering from endometriosis and raise awareness too. Elsa actually wore this Sunday for Easter and I really think she loves the twirl of the skirt.
Friday, March 23, 2012
Sewing, Shirring, Maxi's and Layers
Well, if you didn't already know I was gone this last weekend and I promise to show you all the fun fiber stuff I got while I was away. However, I have some projects that I haven't blogged about and today is the day I blog about them.
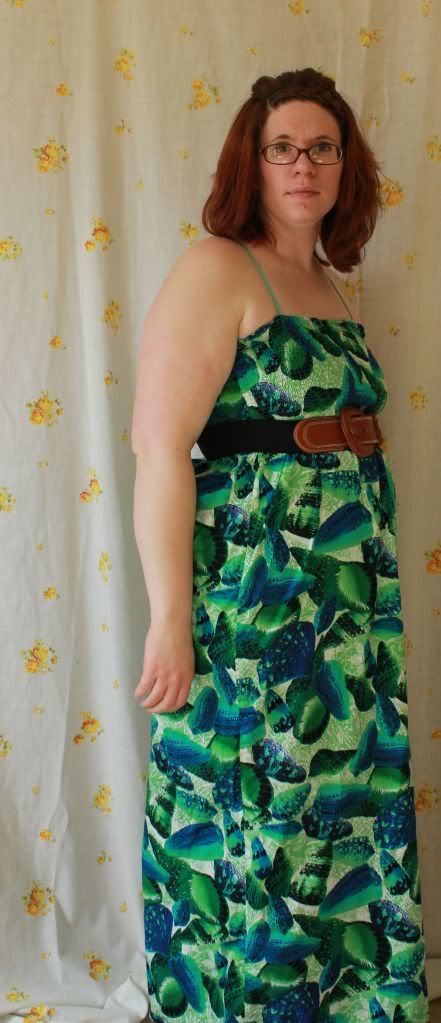
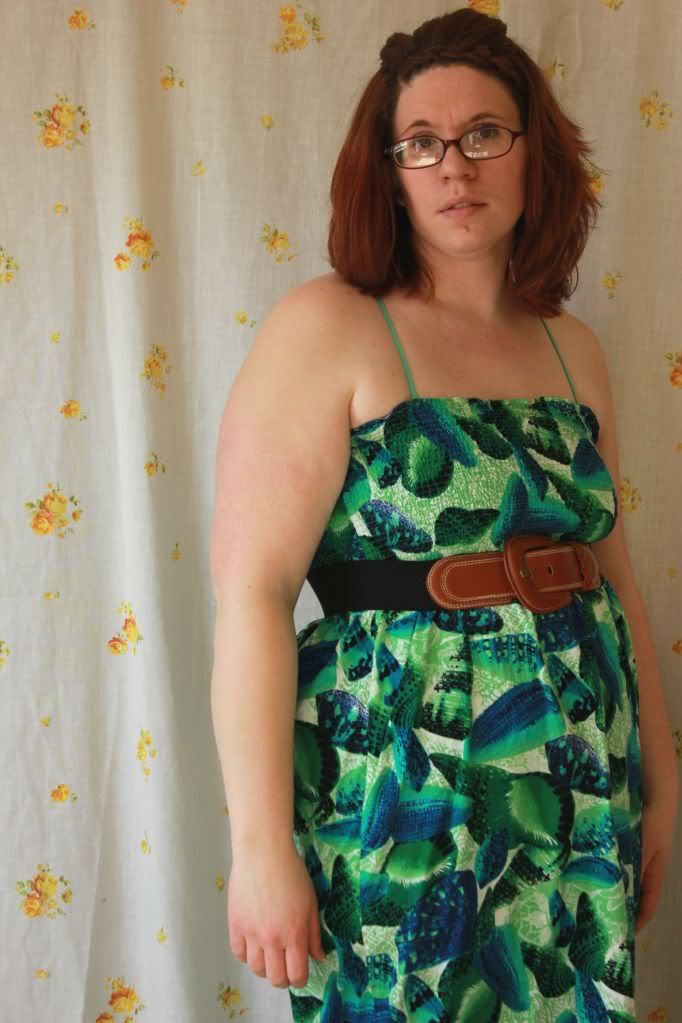
First up is probably my all-time favorite dress that I have made. I think that it is a combination of the fabric (a gift), shirring, and the length. Something about Maxi Dresses just make my day :) I put one on and BAM! I feel instantly elegant even if it's just a long piece of fabric with elastic at the top.
I hope you love it as much as I do...honestly I think that it's a great first dress project for anyone as you can make it as long or as short as you want. Add pockets, color blocking make it from cotton like me or from knit...the possibilities are as endless as your imagination!
As I look through all my pics of me I look so serious and somber...but really I ham it up when I take the practice shots....
I hope you all have a great weekend and get your craft on! I'm going out with Husband tonight for an old fashioned dinner and a movie date! So excited :)
First up is probably my all-time favorite dress that I have made. I think that it is a combination of the fabric (a gift), shirring, and the length. Something about Maxi Dresses just make my day :) I put one on and BAM! I feel instantly elegant even if it's just a long piece of fabric with elastic at the top.
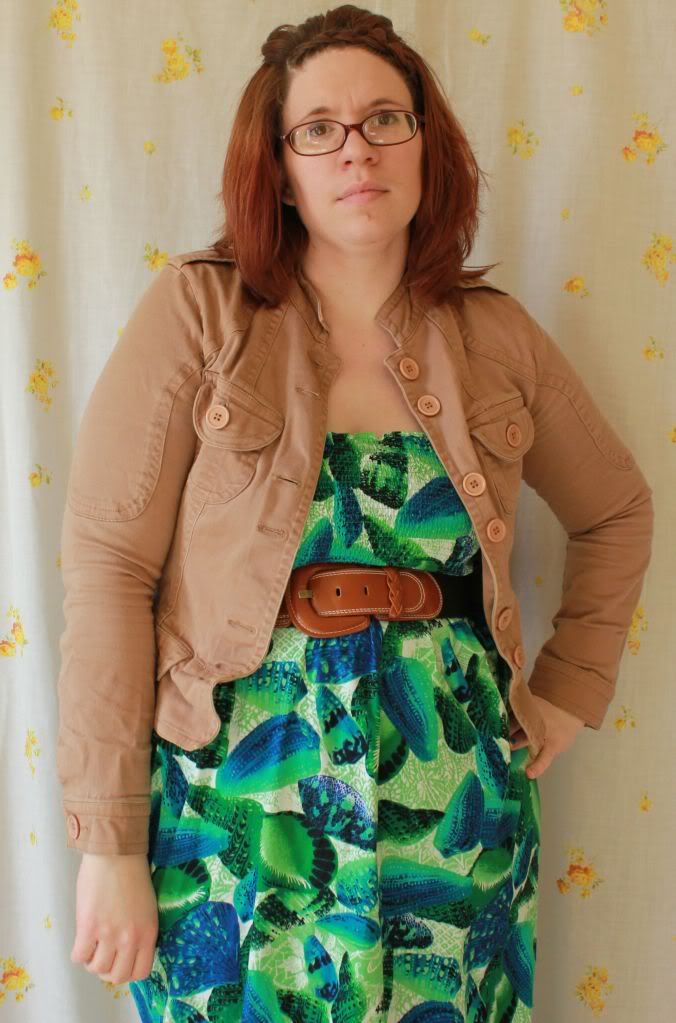
What I love most about this dress (besides having a cami that matches perfectly so I can fake you with spaghetti straps) is how easy it is to layer! I live in Washington State and winter here can be brutal (we just got snow yesterday & it's spring). Still you can wear a maxi dress even in winter so long as you wear it with a jacket...
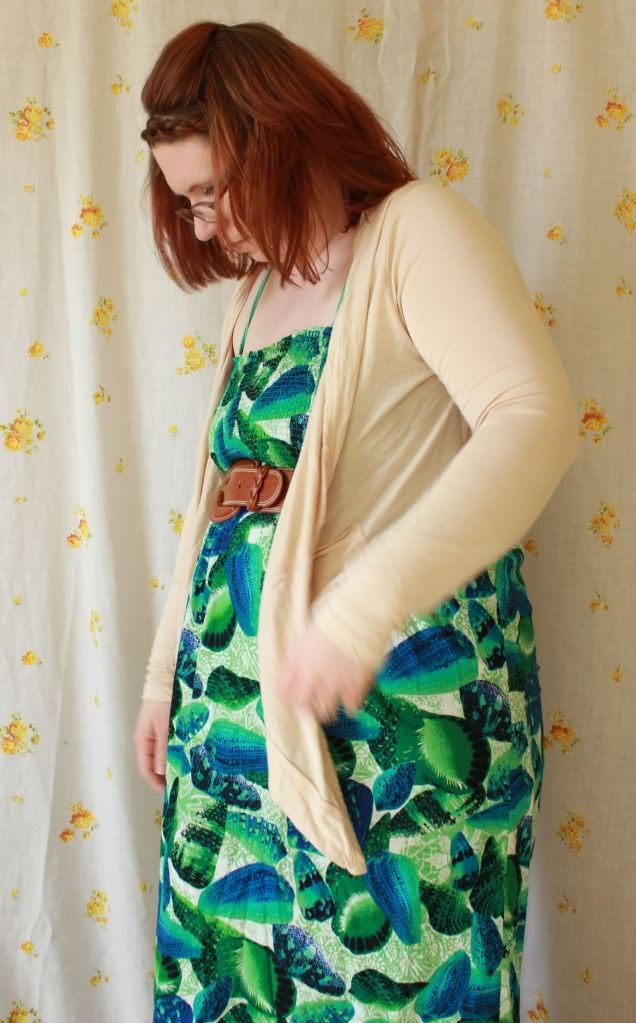
Or maybe a sweater...
Really I think the possiblities are endless! I am still hoping to put some sleeves/straps on this so that come summer I can wear it as is...but until then I'm loving the layers :)
This dress is soooooo easy to make because it's just a rectangle with shirring at the top. What I did was take my hip measurement and added 5 inches. 1 inch for seam allowance and 4 for ease...I sorta wish I had added just a bit more for ease but what's done is done. Because my fabric wasn't as wide as my final measurement I divided it in two. I then determined how long I wanted the dress to be added 2.25 inches (.25 for top hem 2 for bottom hem). Then I cut out 2 identical rectangles from those two measurements.
Next I sewed along one long edge of the fabric, finished my seam with the serger and then set to sew a narrow hem at the top. I only did a narrow hem because I don't have green or blue thread for my serger (yes I am a thread snob, no you can't talk me into buying the cheap stuff so I have to save my pennies like a hoarder saves everything to buy thread). If I had matching thread I would have just run it through the serger and skipped the narrow hem.
The next step is to wind a bobbin with elastic thread. Actually I wind at least 2...though I like to have 3 because when you get in your shirring groove it's a pain to stop and wind another bobbin. There are lots of great tutes on shirring out there so I won't beat a dead horse over it. I simply sewed a straight line on the horizontal every 1/4 inch for about 7 inches. Then I sewed and finished the second side seam, added the hem at the bottom and wore it! It took me less than 24 hours to make and I get comments on it every time I wear it!
I hope you love it as much as I do...honestly I think that it's a great first dress project for anyone as you can make it as long or as short as you want. Add pockets, color blocking make it from cotton like me or from knit...the possibilities are as endless as your imagination!
As I look through all my pics of me I look so serious and somber...but really I ham it up when I take the practice shots....
Wednesday, March 14, 2012
My Commuter Cowls!
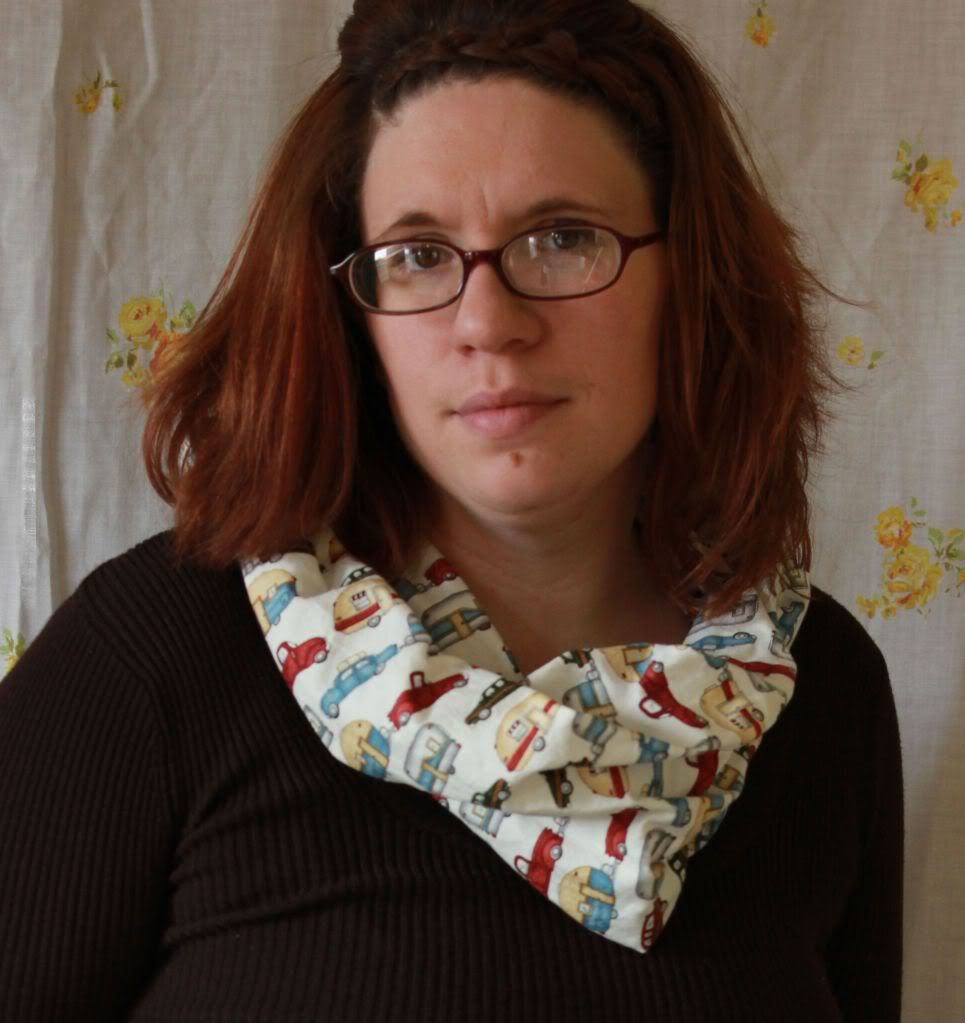
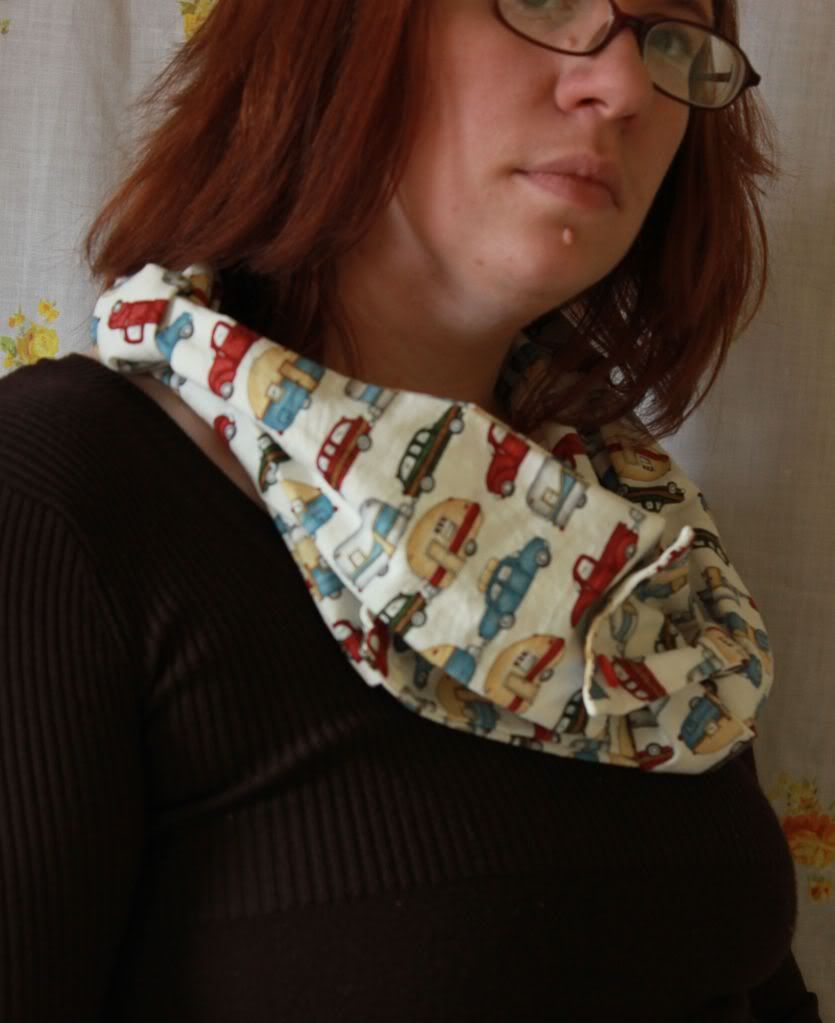
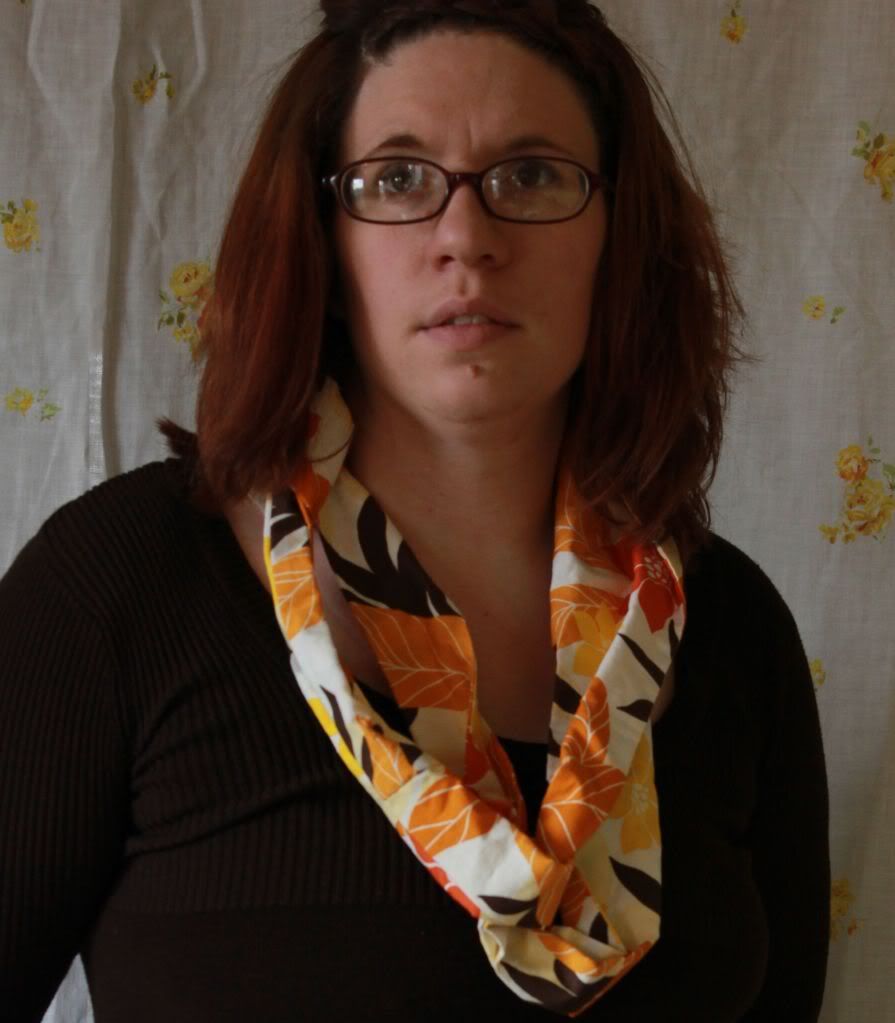
The lovely Shannon of luvinthemommyhood was looking for pattern testers a few weeks ago for her new Commuter Cowl Pattern. Me being the wonderful friend that I am (yes, I'm incredibly humble too) I volunteered to help her out. Honestly I had to help her out because whatever Shannon concocts is always...and I mean ALWAYS...fabulous! I tend to get a narrow minded with her patterns. I mean I did make 6 (though I just realized I only posted 5) MODify dresses (1, 2, 3, 4, 5). This pattern is no different! I've already made two, with fabric designated for 2 more...plus I dream of more after that.
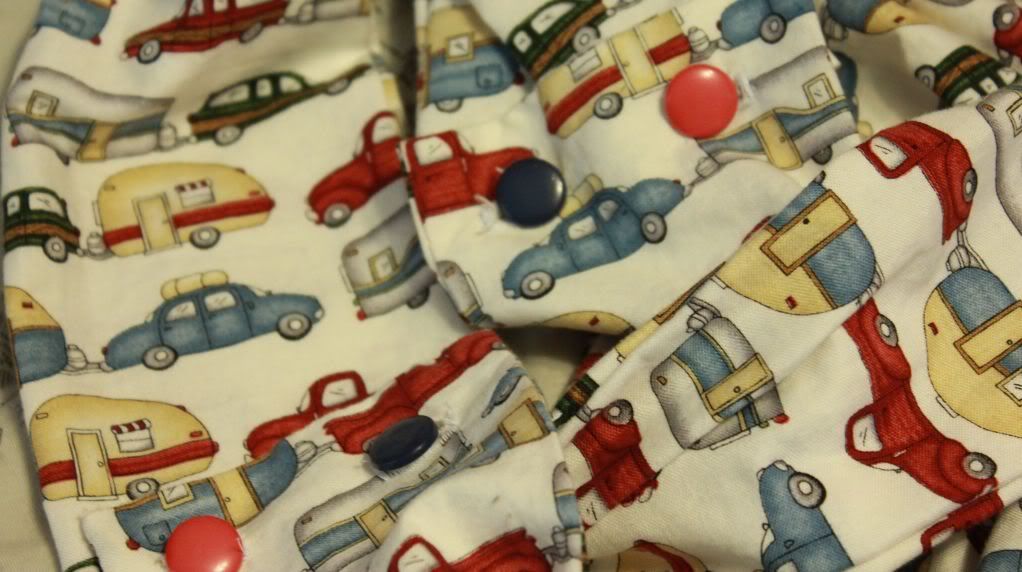
| I added the buttons for flair...they aren't in the pattern, don't be scared! |
I love them both! I think what I love so much about Shannon's patterns is how she comes up with not just stunning projects but quick ones too. The first cowl I made (the orange/brown/yellow one) took me 2 hours to complete. That includes downloading the pattern, pre-reading the directions, cutting out and the hand stitching at the end. Once you get the hang of it you could easily make this in less than an hour.
I also love that it only uses 1/2-3/4 yd of fabric, depending on how big and fluffy you want it. This is fantastic for those Oh-so-pricey-fave-fabrics...you know the ones you cringe when you see the price per yard...you can easily get half a yard then make a special cowl and not feel quite so guilty about the fabric price. I know that the next time I see a fabric I want I'll just get half a yard and make me a cowl!
The other thing that I love about this pattern is that it is probably the best beginner project I've seen for sewing. It covers all the basics in one simple pattern. I know that the next time I teach someone how to sew I'm going to use this pattern. Shannon's directions are clear, concise and has lots of pictures for the visual learners out there.
So what are you waiting for? Go head over and show Shannon some love by purchasing a copy...you won't regret it I promise!
Thanks Shannon for another great pattern...if you keep it up I may have to follow your blog in secret as my husband would ban me for sure ;)
So tell me what do you think? Can you get addicted to the Commuter Cowl like me? Excited to make one of your very own? And yes...I did get a hair cut, but you probably didn't notice since it was in the back under all my other hair ;)
Thursday, March 8, 2012
A Dapper Gent
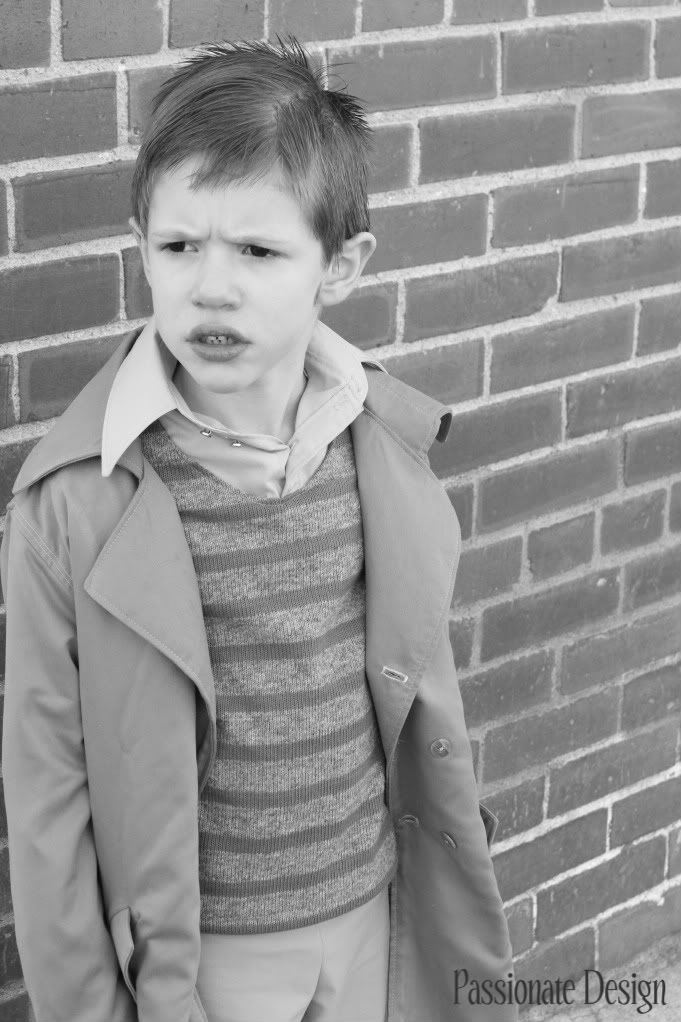
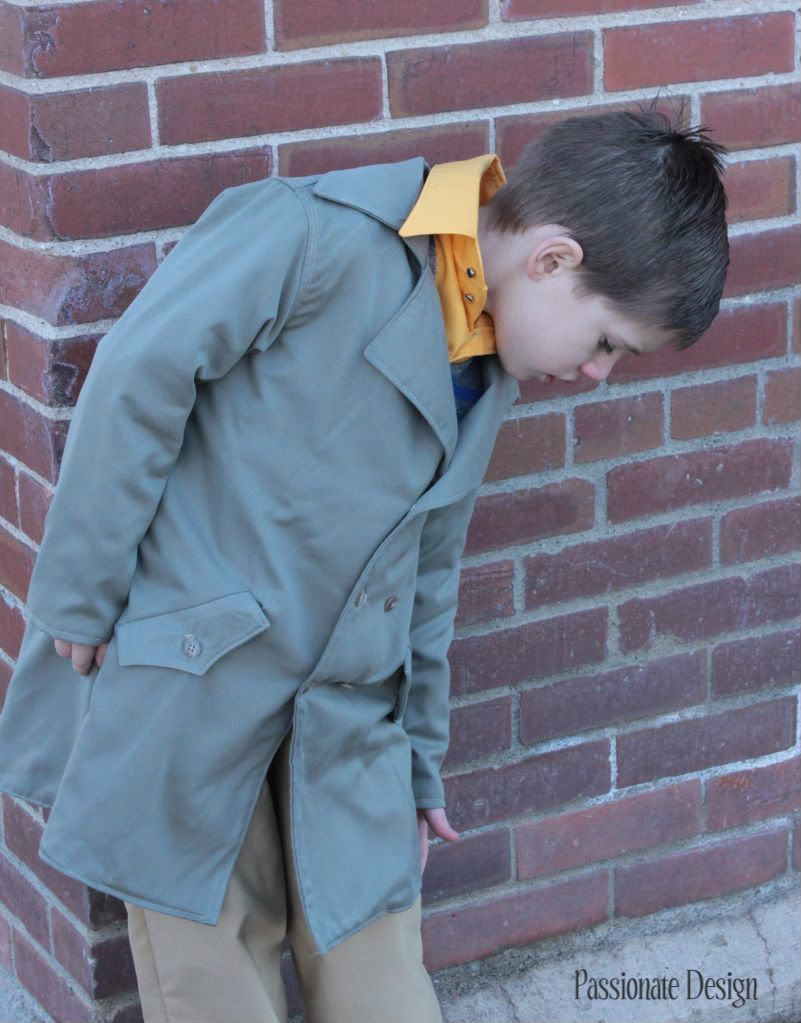
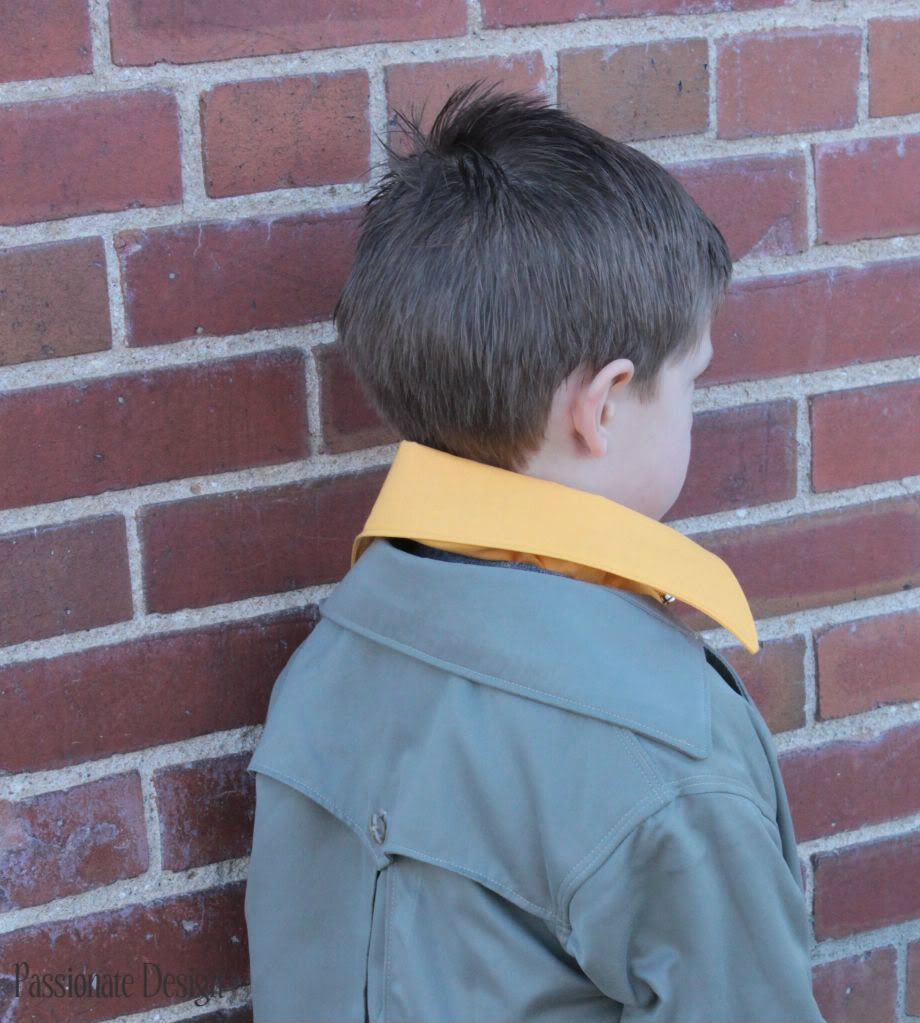
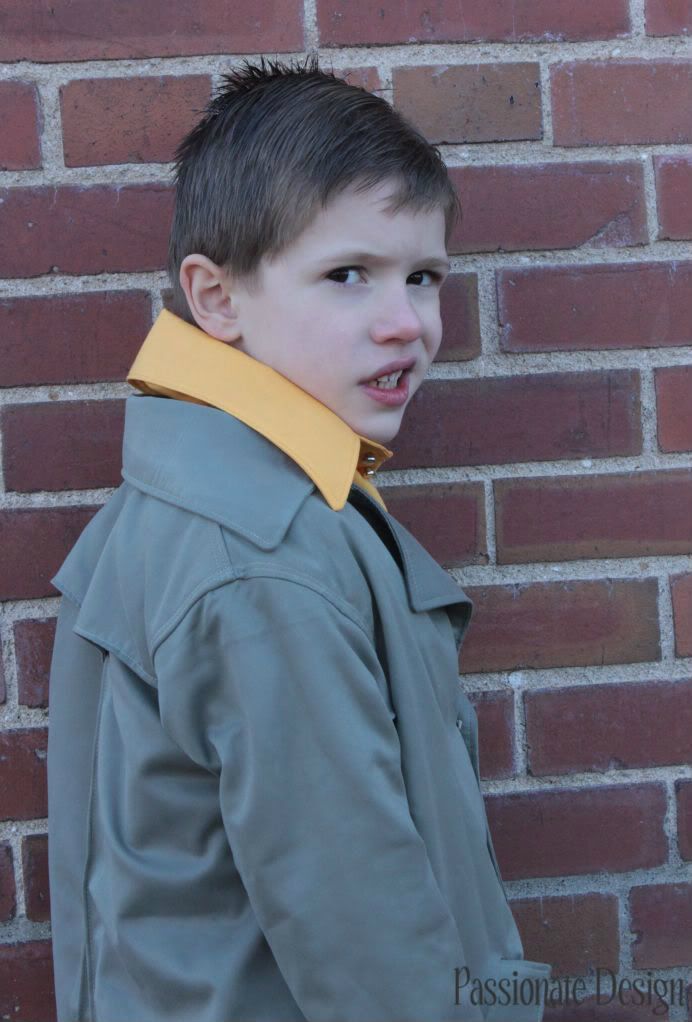
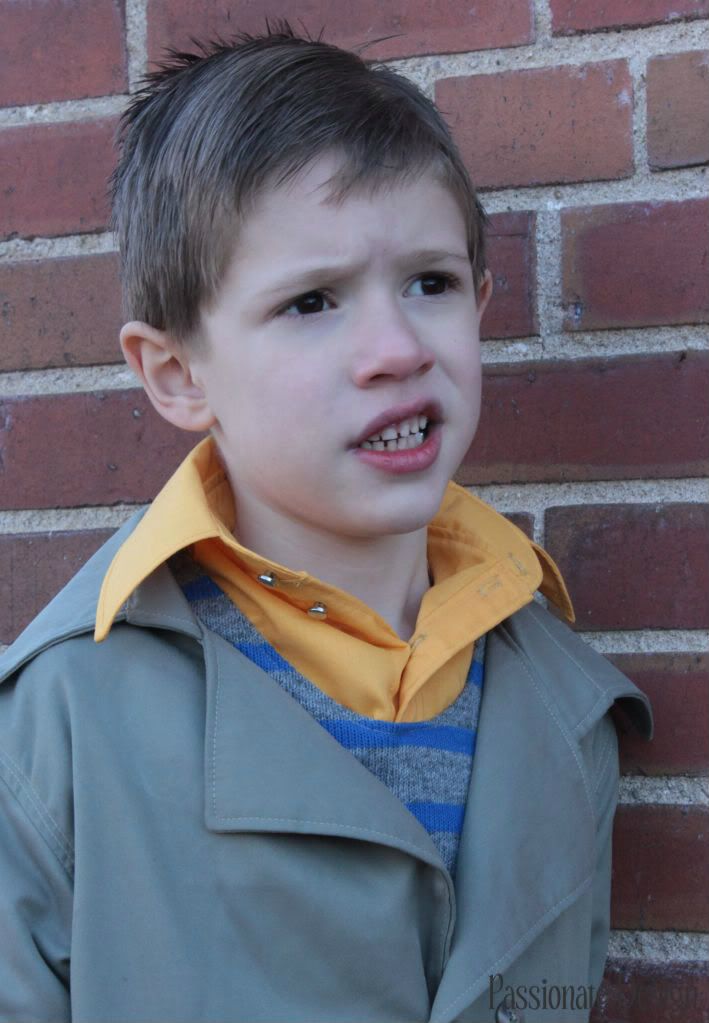
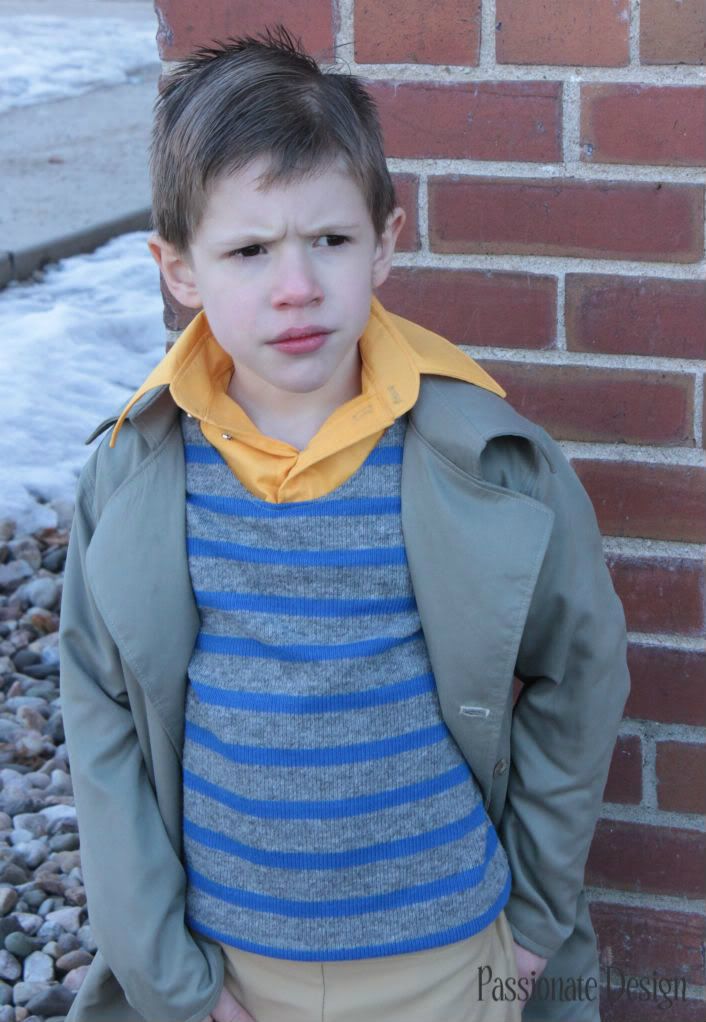
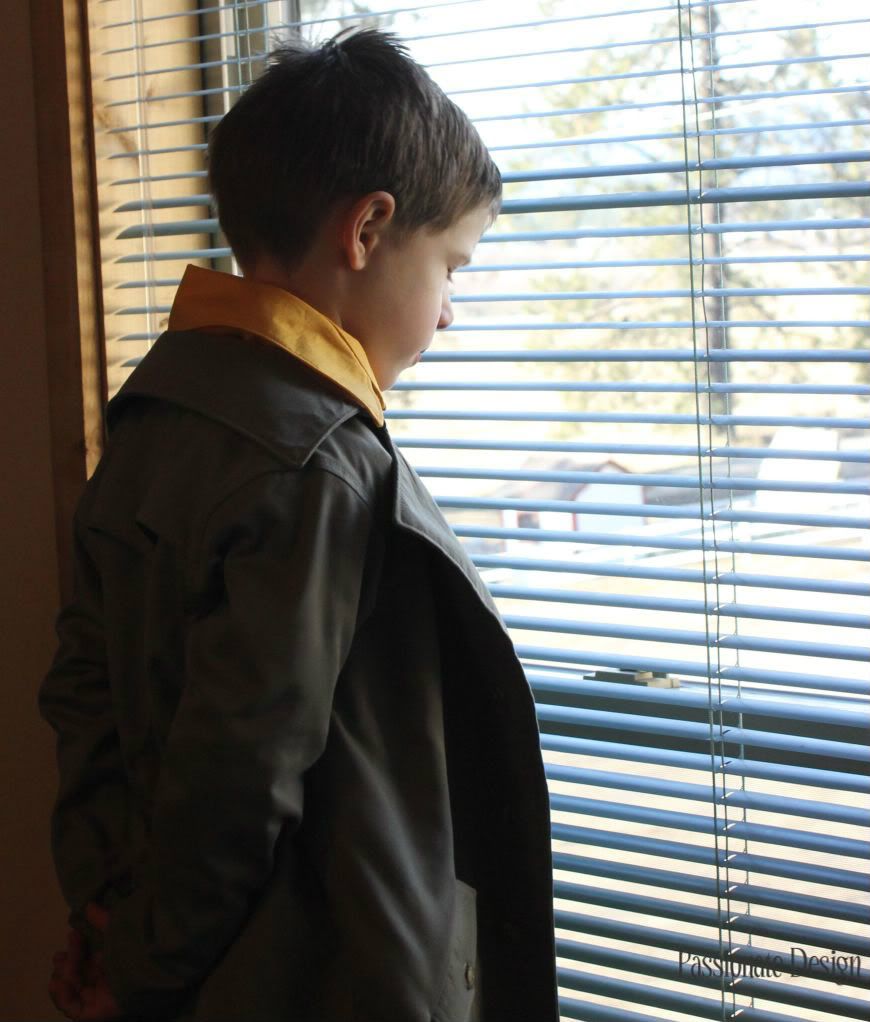
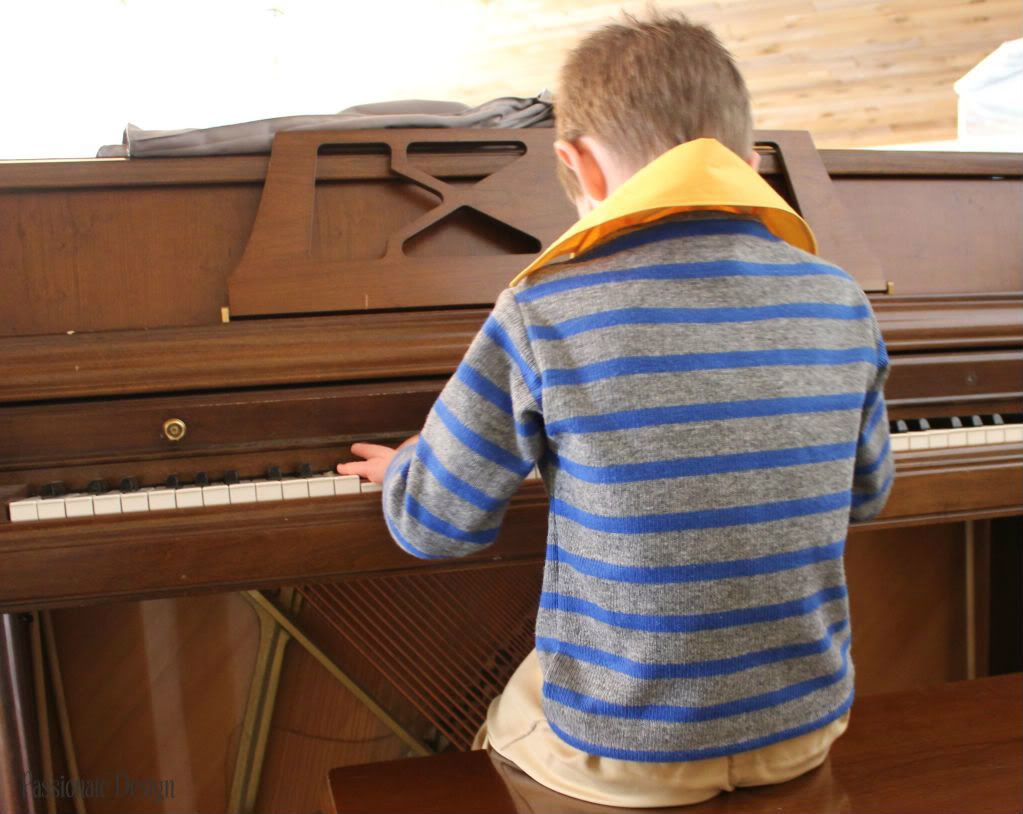
So I know I've been hinting at this project to you guys this week and I am happy to report that it is finished! Not just finished but I have pictures to boot. I am one happy momma :) Vinny is wearing his outfit today, he was super excited to do so and already I've heard "Where did you find that?" more than once. Does my heart so much good to hear from others that they thought I bought what I in fact made. Enough chatter, more photos....
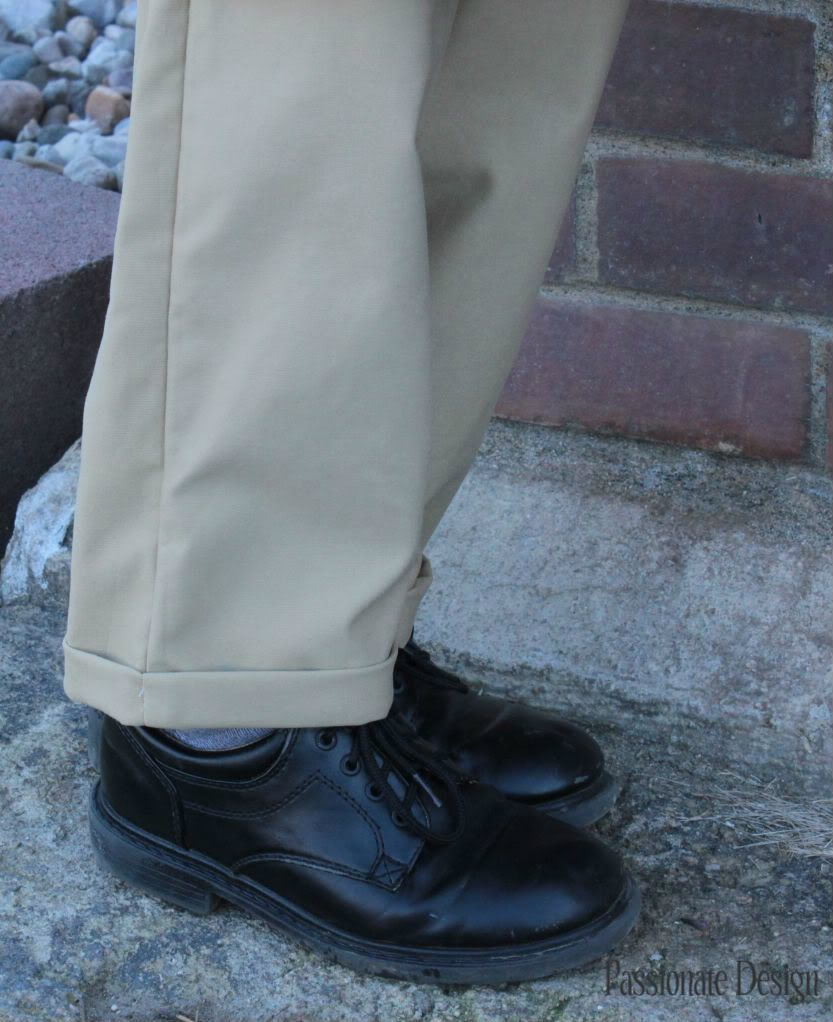
| cuff on pants |
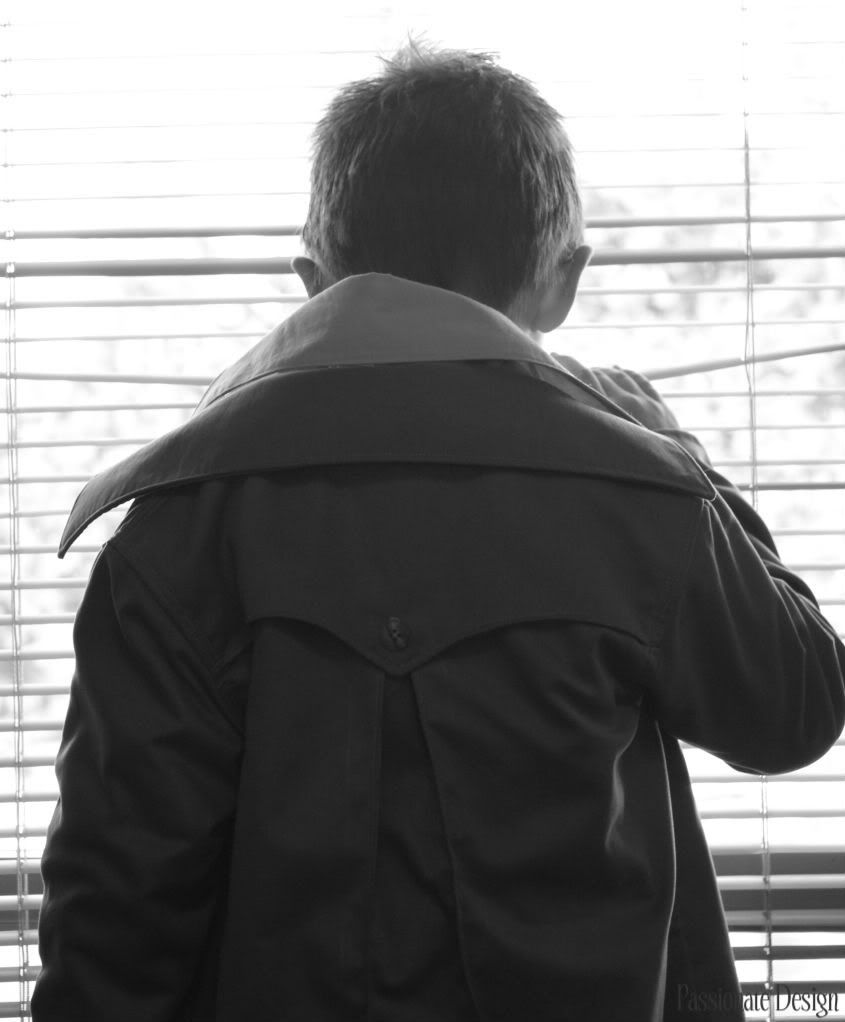
| top stitching detail on back of jacket |
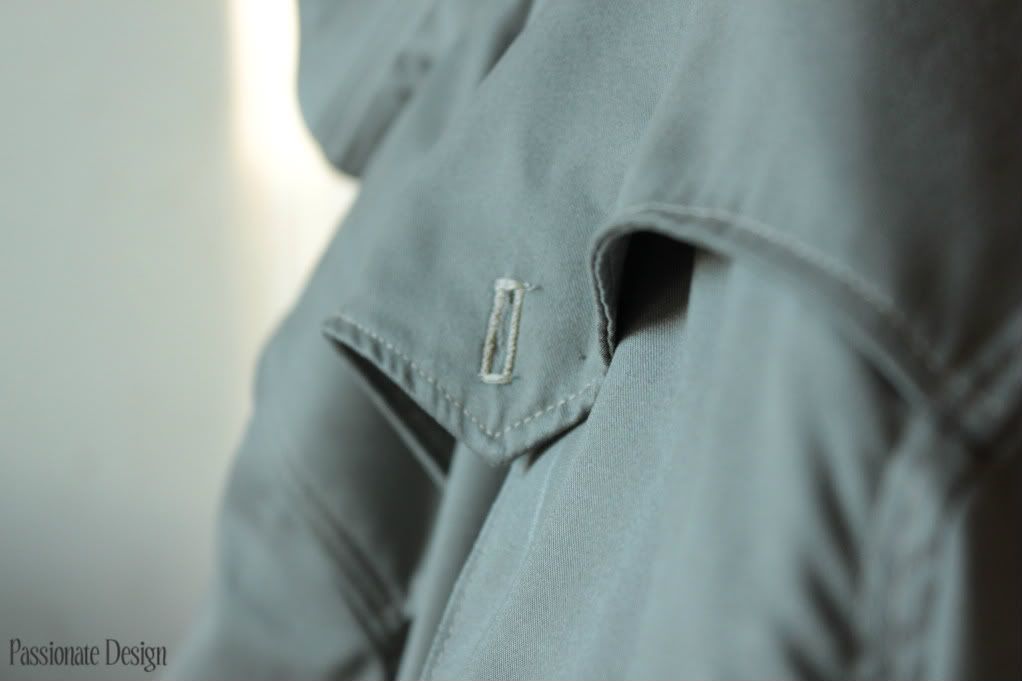
| buttonhole for storm flap |
| double top stitching around sleeves |
Okay, so I think you get the picture though now I'm wishing I had taken pictures of the lining...maybe the light will be in my favor when this Dapper Gent gets home from preschool. Vinny was a real trooper this morning, posing for me, going all around to different places to get pictures. Truthfully this kid has been super excited about this outfit. When I finished the pants and I was trying them on him he said to me "I just want to wear them now." Not sure if that means they were comfy or if he didn't want to change back into his old pants (which he had to do anyway). This morning you couldn't contain his enthusiasm when I told him he could wear the coat to school...jumping up and down I tell you.
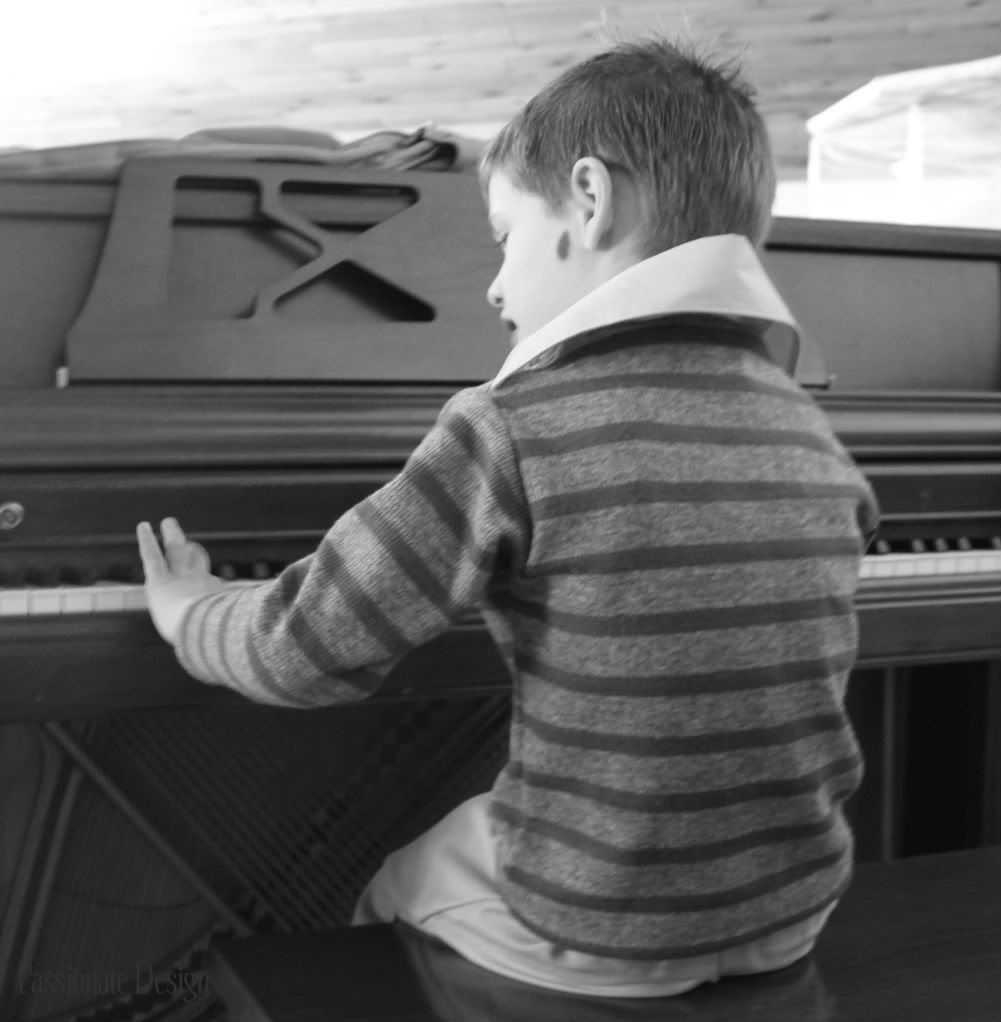
So a little bit about the pieces. The top is all one piece and not a refashioned sweater, nor one I knit, the fabric came like that. I loved it when I saw it (it was gifted to me) and knew something wonderful would be made out of it. I love the look of layers but dislike the extra laundry and the extra work in getting dressed. So I just whipped up a collar stand and just enough of a shirt to sew it under the the seam of the neckline on the 'sweater.' I love that I used a bright yellow as it makes the whole thing just POP! I just whipped up a pattern of my own for the top.
The pants are also just a quick whip up too. I new I wanted the cuff to fold over I think it really adds that extra edge to the outfit which while very classic and speaks of almost an era gone by is still very much timeless.
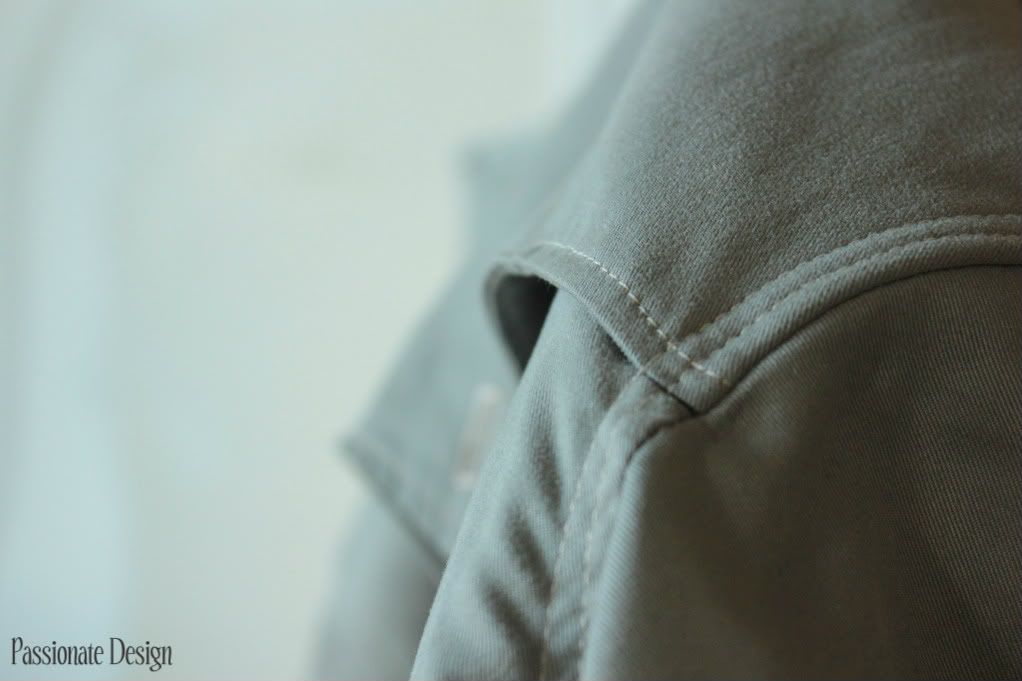
Though the whole outfit begins and ends with the trenchcoat. I would LOVE to tell you that I designed the pattern, and I know that I could but with time being of the essence plus being sick I went with a pattern. It's from Ottobre Autumn 2009, number 27 "Roger M." trenchcoat. I of course made my modifications, first being to lengthen it from hip length to knee length. I nixed the front storm flap, belt, collar flap and sleeve tabs. I loved those details but didn't really go with the look I wanted. The jacket is completely lined an I must say I'm pretty proud of those buttonholes...I do not have a buttonhole setting on my machine so I had to adjust the zig-zag with and stich length to make them. The pockets were a first for me...slash pockets. So much fun!
I really think the biggest thing I did for this pattern is the top stitching...it took the coat from nice to WOW, where did you find that?
My final comment is about the photos, the only editing I did to them is cropping and putting my blog name on them. I didn't tweak the contrast, I didn't sharpen the images I didn't even add to the exposure. This is why I am madly in love with my new camera and will never turn it on Auto or use the flash :)
Now I'm about to hit the publish button then link this baby up to the audition link on Project Run & Play...cross my fingers and hope real hard. Still no matter the outcome I will be ridiculously proud of that coat, proud of how professional it looks, proud that I sucked it up and tried it.
Please, pretty please leave me a 'friendly thought' to tell me what you think. I'm ever so excited to share this with you.
Subscribe to:
Posts (Atom)